
Let me tell you something that took me a while to learn the hard way. Slapping a GoPro on your helmet without thinking it through is one of those things that seems simple until you’re halfway down a trail realizing your camera is gone, or worse, it’s dangling off the side messing with your balance.
Whether you ride motorcycles, mountain bike, snowboard, or ski, the basics of how to mount GoPro helmet setups correctly are pretty much the same. And once you nail it, the footage you get is genuinely worth the effort.
This guide is for anyone who wants to do it right the first time.
First, Why Even Mount It on Your Helmet?
Chest mounts are fine. Handlebar mounts exist. But here’s the thing: your head is naturally the most stable part of your body during any activity, so even with GoPro’s in-camera HyperSmooth stabilization, helmet mounts are the best way to get quality, stable POV content. GoPro
The footage follows exactly where you’re looking. If you turn your head into a corner, the camera turns with you. That’s why most riders, skiers, and snowboarders prefer this setup. It just feels real.
What You’ll Need Before You Start
Nothing complicated here. You probably already have most of it.
A GoPro (any model works), an adhesive mount (flat or curved depending on your helmet shape), isopropyl alcohol or a clean cloth for surface prep, and ideally a GoPro tether as a backup safety line.
When buying a mount, just get one of each (flat and curved) so you don’t run into problems, since the right choice depends on the surface shape and position you’re mounting on. VloggerPro
Choosing Where to Mount GoPro on Your Helmet
This is probably the decision most people rush, and it makes the biggest difference.
Top of the Helmet
The most common spot. Easy to attach, gives a wide elevated view. Works great for cycling, snowboarding, and general action sports. One downside though: if you ride through tree branches or dense trails, the camera is fully exposed up there. For off-road motorcyclists in particular, a GoPro on the top or sides of the helmet can be a recipe for losing it, and several people have found this out the hard way. AGVSPORT
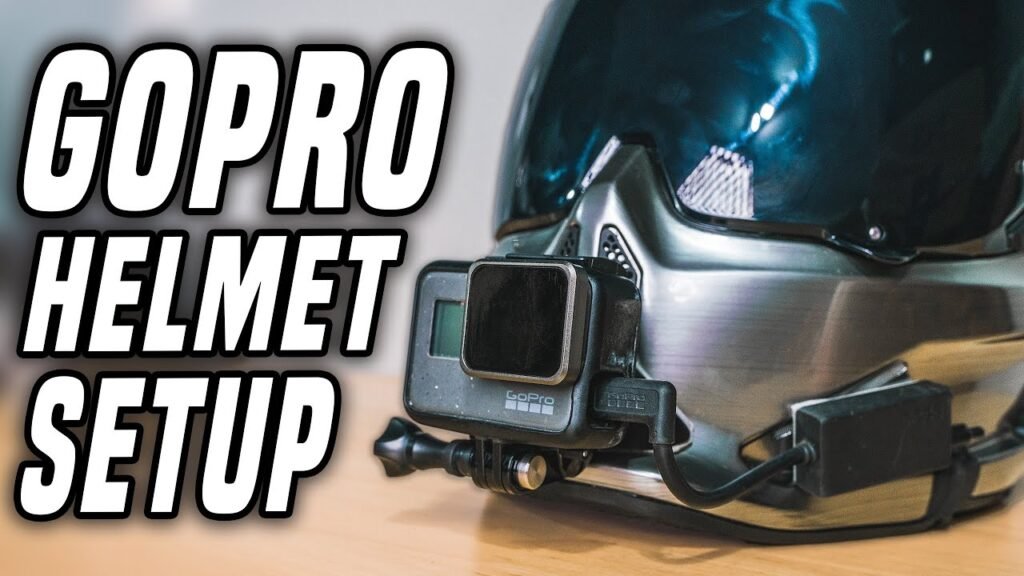
Chin Mount (Great for Motorcycles and Full-Face Helmets)
This is where it gets interesting. Based on personal experience from motorcycle riders, the best place to mount GoPro on a full-face motorcycle helmet for off-road riding is on the chin bar. AGVSPORT The angle simulates an almost exact first-person perspective. It’s immersive, and the camera is far less exposed to branch snags or overhead obstacles.
The chin position provides stability and keeps the camera below your line of sight, so there are no distractions, just pure riding footage. Street Bikers World
Side Mount
Works well if you want a slightly different angle, and it’s popular with riders who don’t use full-face helmets. You get close coverage similar to a front mount, and you can choose either side of the helmet. AGVSPORT Just keep in mind that if your camera sticks out too much on one side, it can throw off the balance slightly on longer rides.
Vented Strap Mount
If you don’t want to use adhesive at all, this is a solid option. Strap mounts are usually used to attach the camera through the top vent holes of a helmet, and they’re cheaper than most adhesive setups while still offering decent angles. VloggerPro They’re also easy to remove and reattach, which is handy if you share your helmet or switch between sports.
Step-by-Step: How to Properly Attach the Mount
Step 1: Clean the Surface
Don’t skip this. Wipe down the exact spot you’re planning to mount with isopropyl alcohol or a clean damp cloth. Let the area dry for 30-60 minutes before you even touch the adhesive. Icebike Grease, dust, or moisture on the helmet surface is the number one reason mounts fail mid-ride.
Also Read Best SD Card for GoPro (Fast, Reliable Picks That Actually Work)
Step 2: Heat Up the Adhesive
Heat up the adhesive before sticking it to your helmet. A hairdryer works fine for this, and it helps the adhesive bond properly to the surface. GoPro Don’t skip this step either, especially in cold weather.
Step 3: Press and Hold
Once you stick the mount down, don’t just press it for a few seconds and call it done. Use c-clamps or spring clamps to hold pressure on the mount for 4-5 hours after sticking it. If you don’t have clamps, a heavy object that can sit on it works too. VloggerPro
Step 4: Wait Before Riding
Allow the adhesive to cure overnight, or ideally for up to 24 hours, before actually using it. GoPro I know it’s tempting to test it immediately, but this waiting period makes a real difference in how strongly the mount holds, especially during impact or at high speeds.
Step 5: Test It
Before your first real ride, give the mount a firm tug with your hands. The mount shouldn’t move at all. If it does, it’s time to swap it out rather than risk it mid-session. VloggerPro
The Safety Stuff People Skip
To be honest, most mounting guides gloss over this part and jump straight to the cool footage tips. But it matters.
Never drill into your helmet. Permanent modifications can compromise the helmet’s structural integrity and void its certification, whether it’s DOT, ECE, or otherwise. Street Bikers World
Check the legality in your area. No federal law in the US bans GoPros on motorcycle helmets, but California enforces a strict 5mm protrusion limit, making helmet-mounted cameras potentially illegal there with a $250 penalty. Other states are more lenient, so it’s worth checking local laws. Street Bikers World
Add a tether. After reading forum posts from snowboarders and motorcyclists who’ve lost cameras after falls, this one feels obvious in hindsight. Adding a GoPro tether is a simple and cheap solution. Even if the mount detaches in a fall, the camera stays connected to your helmet instead of flying off into the distance. Snowboarding Forum It’s genuinely one of the best five-dollar investments you can make.
Think about weight and neck strain. A GoPro mounted on the front of your helmet can cause a heavy feeling that draws your face down during long rides because of the extra weight. AGVSPORT If you’re riding or skiing for hours, this adds up.
Pros of Mounting GoPro on Your Helmet
Stable, natural POV footage. You literally capture what you see, which is hard to replicate from any other mount position.
Hands stay free. No holding anything, no adjusting mid-ride.
Flexible positioning. Top, chin, side, or vent strap, there’s a setup for almost every helmet type.
Works with GoPro’s stabilization. HyperSmooth video stabilization combined with a helmet mount produces some of the smoothest possible action footage, even on rough terrain or bumpy trails. GoPro
Great for incident documentation. From a safety perspective, having footage of your ride is valuable if you’re ever involved in an accident. If you’d put a dashcam in a car, there’s a strong argument for doing the same on a motorcycle. Go Moto
Cons Worth Knowing About
Adhesive mounts can fail, especially in cold weather or after impact. This is a genuinely common occurrence, with people losing cameras during falls because the adhesive let go. Snowboarding Forum Always use a tether as backup.
Height and exposure. Top-mounted cameras are vulnerable to getting snagged or damaged by branches on trails or off-road tracks.
Can affect aerodynamics. At higher speeds on a motorcycle, a protruding mount creates noticeable drag and some wind noise in the audio.
Limited reuse of adhesive mounts. If a mount comes off, you generally shouldn’t restick it. You’ll need a new mount, and in some cases, a new helmet if the surface is damaged. Icebike
Getting Your Camera Angle Right
One thing I noticed after reviewing early footage: a lot of people angle the camera too flat, so you just see sky. Or too steep, and all you see is your handlebars or your feet.
The lens should point slightly downward to capture both the road and the horizon. Before riding, record a short test clip and review it on your phone. And importantly, sit on your bike when testing since this tilts your helmet slightly forward compared to standing up, which changes the angle meaningfully. Go Moto
For mountain biking specifically, positioning the camera at forehead level and angling it slightly downward captures both the trail ahead and your handlebars, giving context for viewers watching the footage. Julbo
FAQs
1. Is it safe to mount a GoPro on a helmet?
Yes, as long as you use proper adhesive mounts and avoid drilling or permanently modifying the helmet. When the camera is well-secured and not too close to your eyes or face, the helmet actually protects you from the camera in a fall. It’s significantly safer than mounting a camera on a hat or bare head. Photodoto
2. Which is better, top mount or chin mount for motorcycle riders?
For street bikes, the top of the helmet generally works better. For off-road motorcycles, the chin bar is the preferred spot because it’s less exposed to snagging on branches and obstacles. AGVSPORT
3. Can I reuse GoPro adhesive mounts?
Not really. Once an adhesive mount has been used and removed, the bond is weakened. If a mount comes off, don’t try to restick it. Use a new mount to ensure a secure attachment. Icebike
4. How long should I let the adhesive cure before riding?
Let the adhesive dry overnight, or up to 24 hours, before putting any stress on it. Heating the adhesive before applying it also improves the bond. GoPro
5. Will mounting a GoPro void my helmet certification?
Any modification to your helmet, even temporary ones, could potentially affect its DOT or ECE certification. This is why it’s important to use adhesive-based mounts rather than drilling or permanently altering the helmet structure. Street Bikers World
6. What’s the best backup for keeping a GoPro from getting lost during a fall?
A GoPro tether is the simplest answer. It attaches between the camera and the helmet, so even if the mount fails, the camera doesn’t fly off. This approach is widely recommended in user communities after incidents where cameras detached during falls and were lost on trails or slopes. Snowboarding Forum
Final Verdict
Mounting a GoPro on your helmet the right way isn’t complicated, but it does take a little patience. Clean the surface properly. Let the adhesive cure overnight. Add a tether. Think carefully about where on the helmet you want to mount based on your sport and riding style.
The top mount is the go-to for most people, the chin mount is underrated for motorcyclists and full-face helmet users, and the vent strap is a smart choice if you want a no-adhesive option.
Most importantly: don’t rush it. An improperly attached camera is a distraction at best and a safety risk at worst. Do it right once, check it before every session, and then actually enjoy the footage rather than worrying about whether your camera is still up there.
